Lightscribe for Mac
Lightscribe CD and DVD burners are neat. They can print a label on specially coated discs with the same laser they use to burn your data. There are a couple significant drawbacks, though–first, expect each disc to take about half an hour to create at present, although future firmware updates may cut that time down. And second, expect to pay twice as much for special Lightscribe media.
That said, this is a pretty nice option if you don’t need to create custom-printed discs more than once in a while, but want them to look nice when you do. If you have a Mac, though:
1. You’ll want to be sure and buy a LaCie brand burner, because they’re the only ones at present with OS X Lightscribe software.
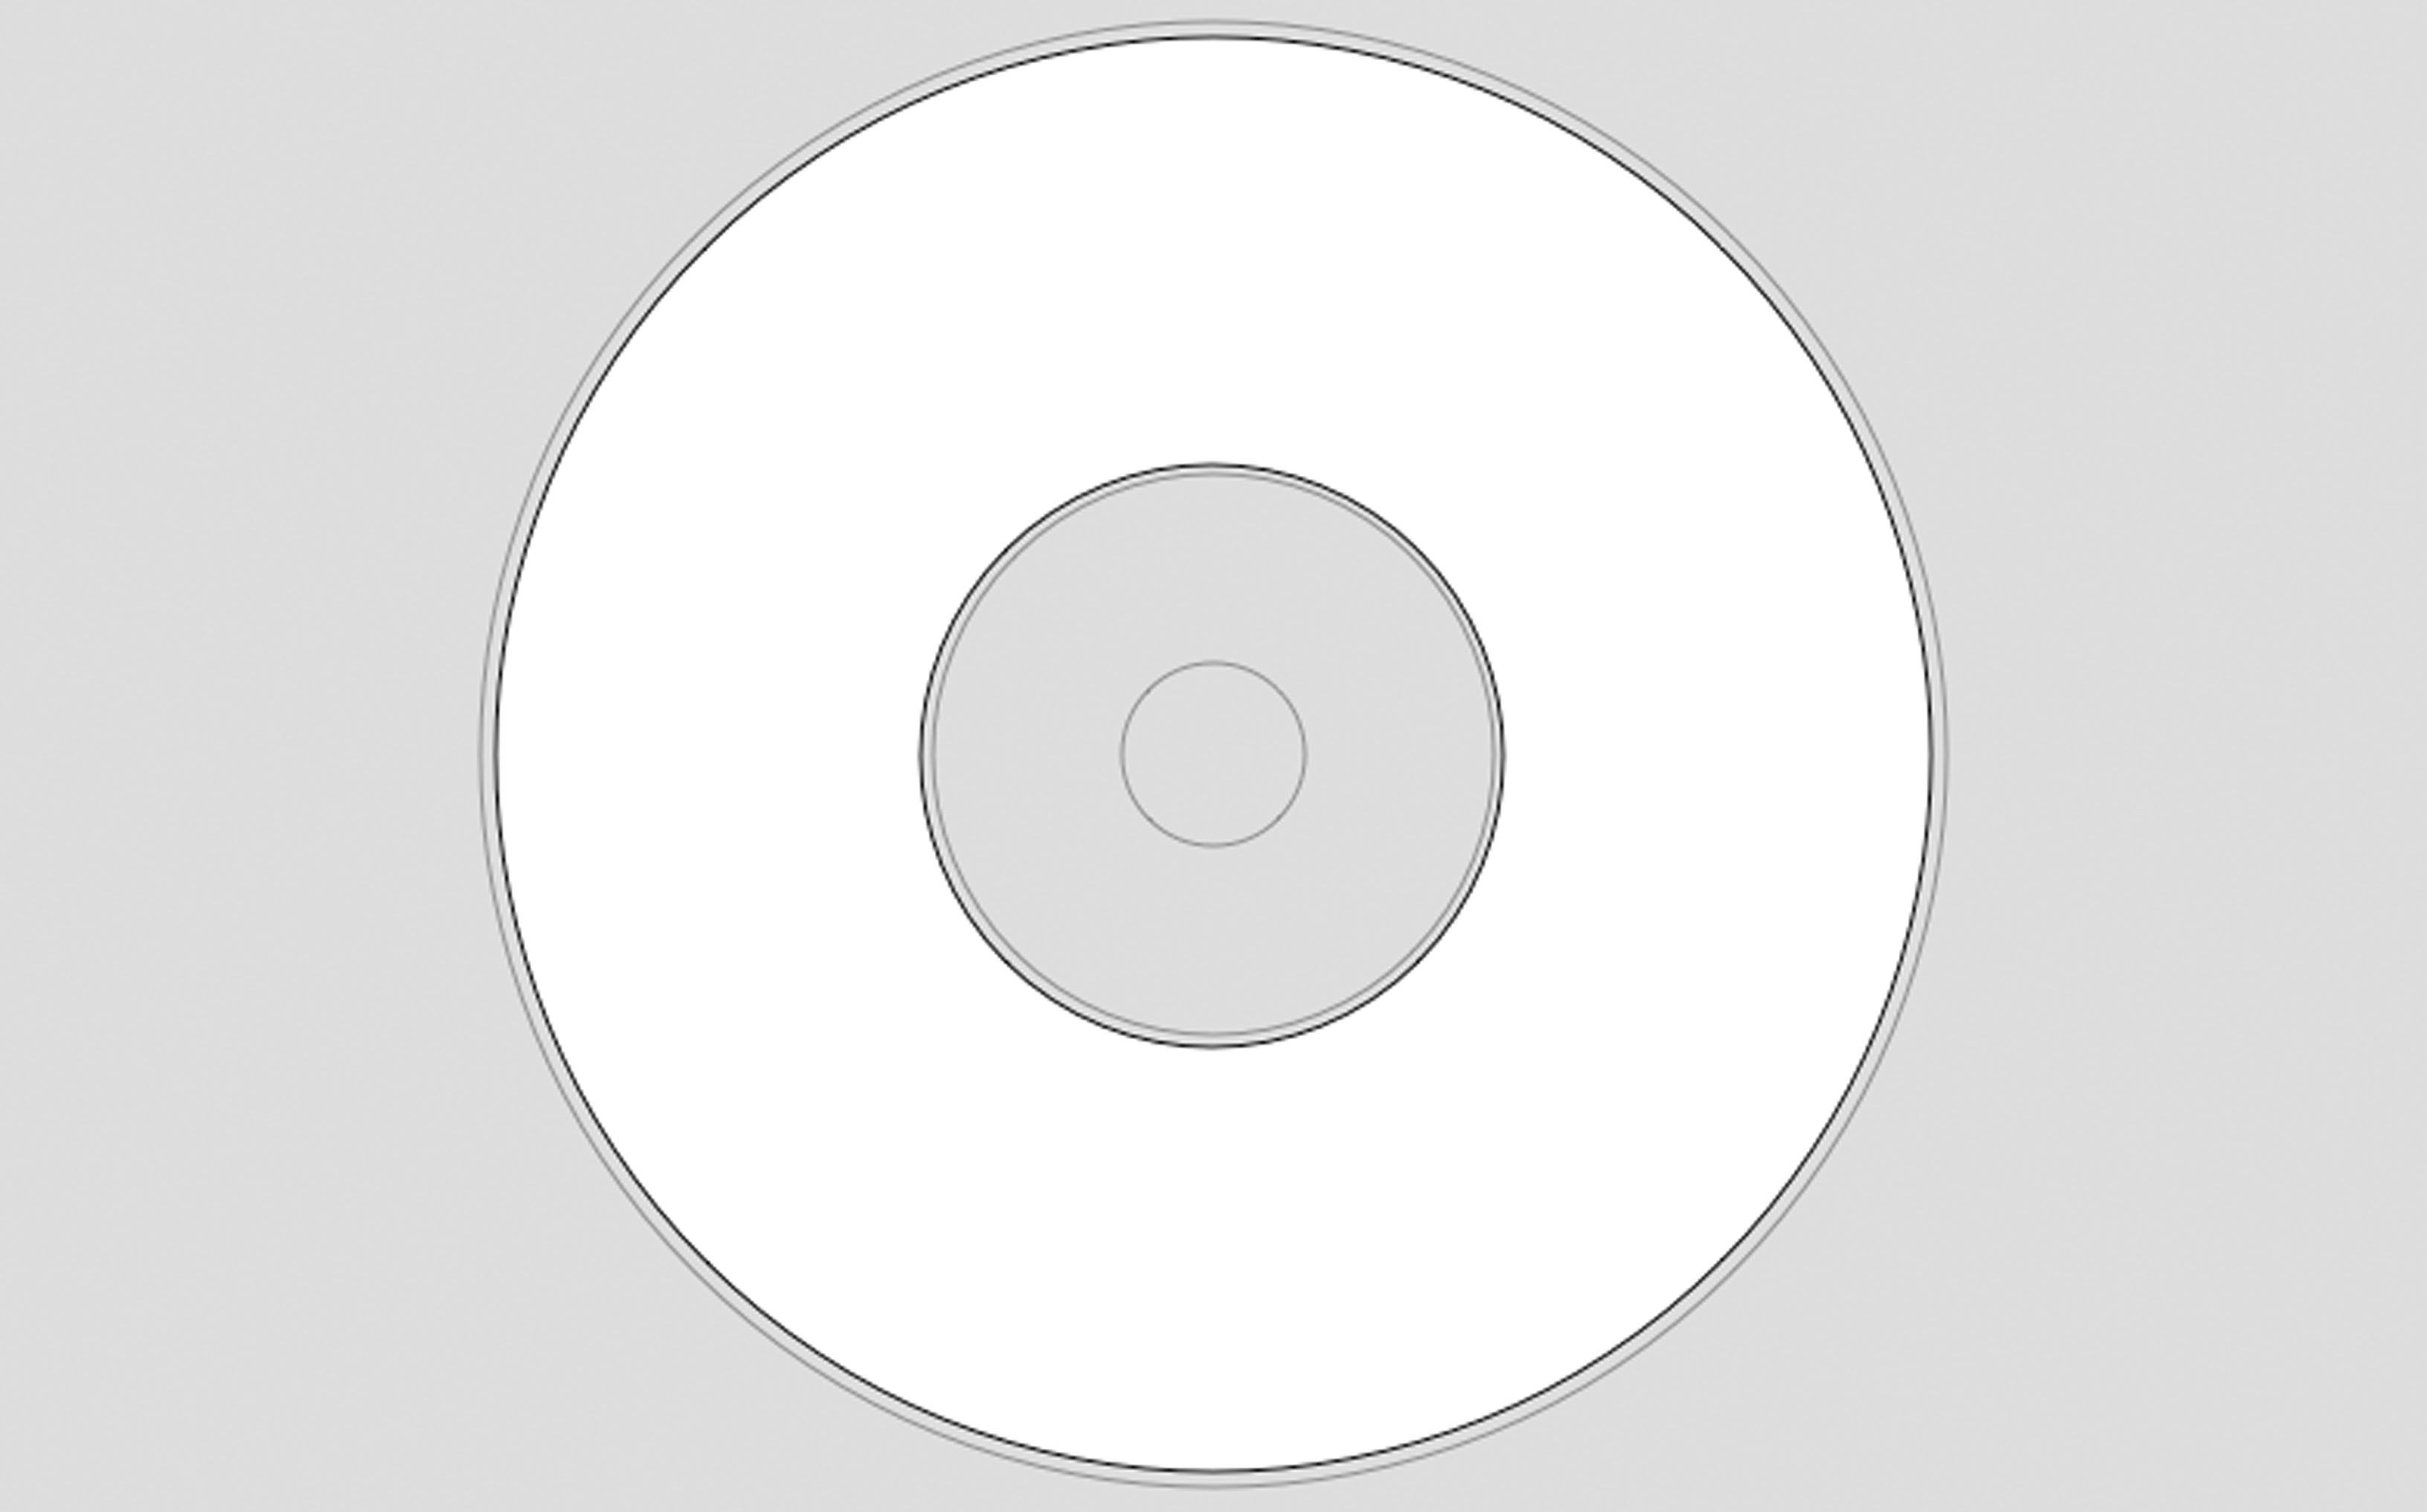
2. You’ll need a template to create your own labels. That way, if you’ve got Photoshop, you don’t need to wrestle with LaCie’s included labelling program. Here’s mine; it’s not perfectly accurate, but it works for me. The Lightscribe process seems to have a pretty decent resolution, so I make my labels 300dpi, just as if they were going to an ordinary printer.
3. You’ll want to buy DVD-R Lightscribe media, not DVD+R. As the older format in this unwelcome format war, DVD-R still has a slight edge in standalone DVD player compatibility. And it’s even more important for Mac users, because older Mac DVD drives won’t read DVD+R. Unfortunately, Lightscribe DVD-Rs seem to be a bit rare. The only ones I can find at present are these HP brand 10-packs from CompUSA. At about US$2/disk, they’re not exactly a bargain.
Wireless File Sharing
It’s pretty simple to set up a direct connection between two wireless Macs:
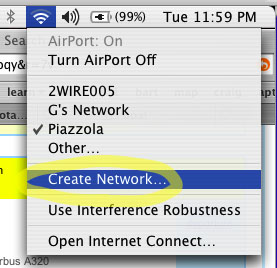
Step 1. First, click on your AirPort icon and choose Create Network.
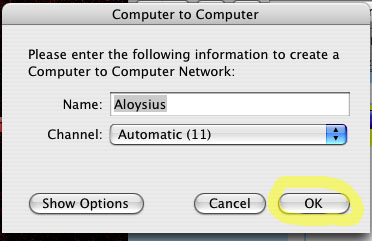
Step 2. Name your network and click OK .
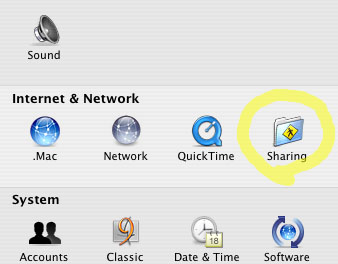
Step 3. Although people can now join your network, they still can’t see anything on your machine. Go into the System Preferences and choose Sharing.
Step 4. Select Personal File Sharing and click Start.
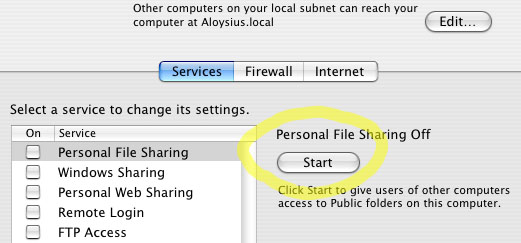
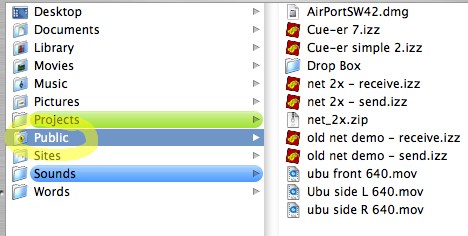
Step 5. Visitors can now access what’s in your Public directory, but they’ll be prevented from nosing around anywhere else.
If you’re interested in theatrical video design, this trick is useful for a lot more than sharing files. Using software like Isadora or Max, you can network several machines together for synchronized video effects. We’ll talk more about that in a future tutorial.
Fix DWG Files in Maya
Wednesday April 12th 2006, 5:15 pm
Filed under:
MayaGetting an Autocad file into Maya without special conversion software isn’t impossible, at least for a simple model:
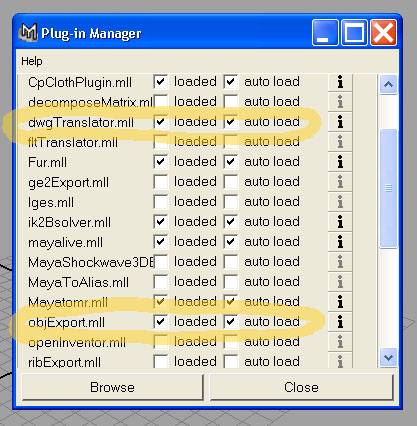
Step 1. Go to the Plug-In Manager.
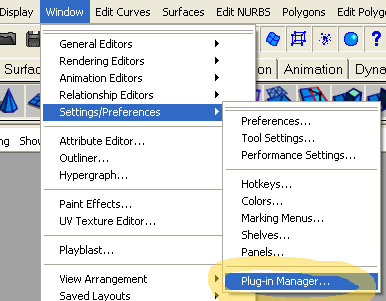
Step 2. Check that dwgTranslator and objExport are turned on.
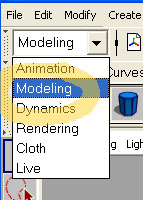
Step 3. Switch Maya into Modeling mode.
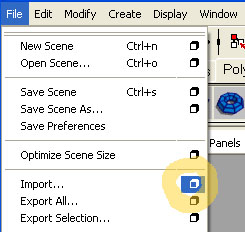
Step 4. Choose the Import option box.
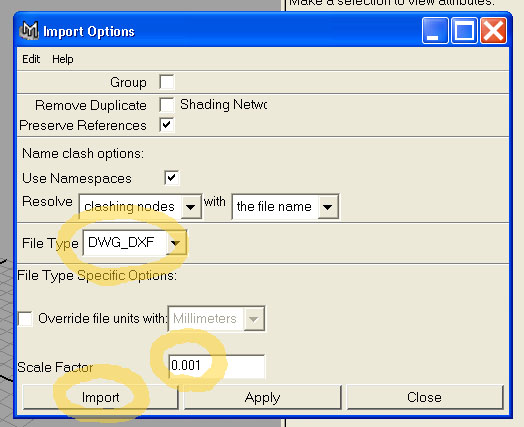
Step 5. Set the File Type to DWG_DXF, and set the Scale Factor to 0.001 (otherwise, Maya will blow your DWG up to an enormous size). Click Import when you’re done.
Step 6. Import the file.

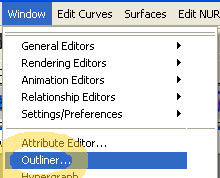
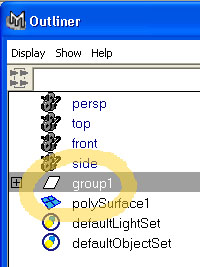
Step 7. Call up the Outliner window.
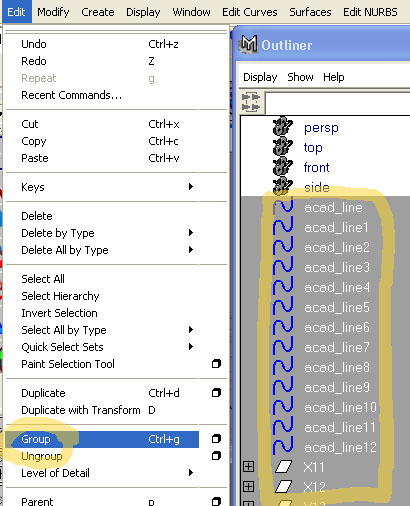
Step 8. DWGs will sometimes arrive in many pieces. Use the Outliner to select all these pieces, and then use the Group command to lump the parts together. (If your file’s parts are already grouped together, you can skip this step.)
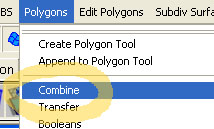
Step 9. With your new group of parts selected, choose Combine from the Polygons menu. This will turn the separate parts into a single object.
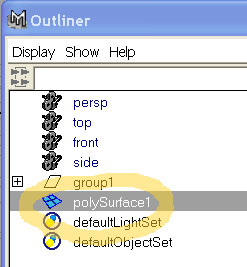
Step 10. Make sure your new combined polygon object is selected, or else the next step won’t work.
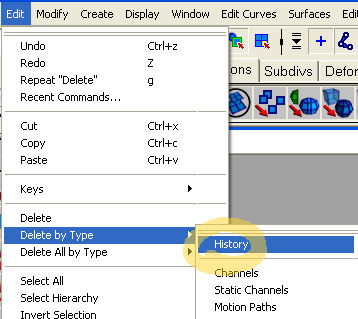
Step 11. Choose Delete By Type/History from the Edit menu. This will break the links between your new object and the old group of imported parts.
Step 12. Select your old group of parts and delete them. (If your new object suddenly disappears instead, you didn’t delete its History properly.)
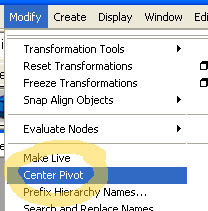
Step 13. The next three steps set up your new object so it works properly in Maya. First, choose Center Pivot from the Modify menu.
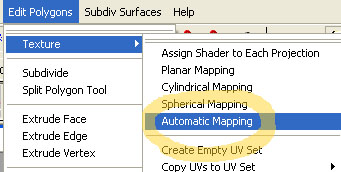
Step 14. Next, choose Texture/Automatic Mapping from the Edit Polygons menu. (You can use any of the commands in the Texture menu to prepare the model for texturing, but I think this is the easiest to start with.)
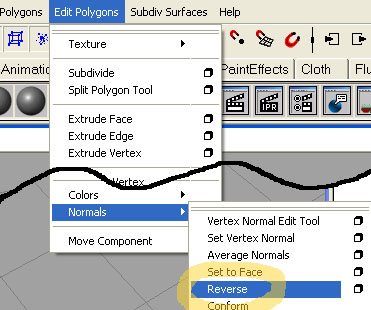
Step 15. Finally, as an optional step, you can choose Normals/Reverse from the Edit Polygons menu if the model appears to be shading strangely.
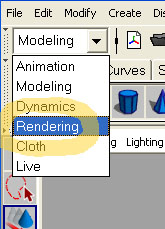
Step 16. That done, you’re ready to texture the model. Switch Maya to Rendering mode.
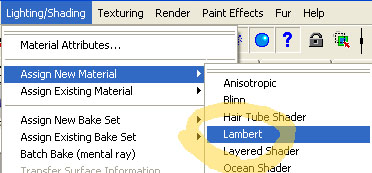
Step 17. Choose Assign New Material from the Lighting/Shading menu. Here, I chose Lambert.
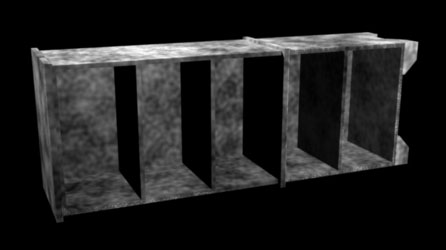
Step 18. Add a texture and check your results–you may need to do some more tweaking before you’re satisfied, but at this point the model should behave normally in Maya.
If you’re still not happy, you might want to try changing your original file’s export settings in Autocad. (I’d recommend avoiding settings that create unnecessary triangles whenever possible.)