Still Images in Final Cut
Monday January 23rd 2006, 1:23 pm
Filed under:
Final CutImporting hundreds or thousands of still images into an editing or animation program is a pretty ordinary task. Final Cut makes it an unnecessarily complicated process, but it can be done:
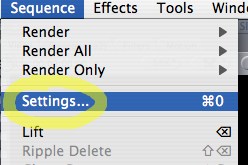
Step 1. Go to your Sequence Settings.
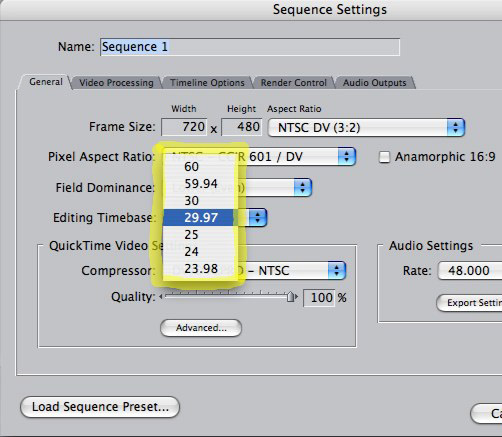
Step 2. Set your sequence resolution and framerate to match your still images. Notice that there’s no straightforward way to set low frame rates like 12 or 10fps, common in animation. For now, if your desired framerate isn’t offered, pick the closest even multiple. If you would like 12fps, for example, you’ll need to pick 24. Yeah, hold on, it gets better.
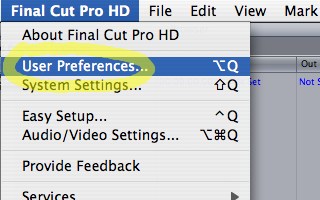
Step 3. Go to your User Preferences.
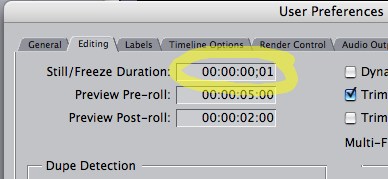
Step 4. In the Editing tab, set your Still/Freeze Duration to the existing frame rate divided by your desired frame rate. If you were able to set the frame rate you wanted in Step 2, then your Still/Freeze Duration should be 1 frame. If you wanted 12fps and had to settle for its closest multiple, 24, your Still/Freeze Duration should be 2 frames. Silly, isn’t it? But that’s what you’ve got to do.
Step 5. Create a new bin, and open it up.
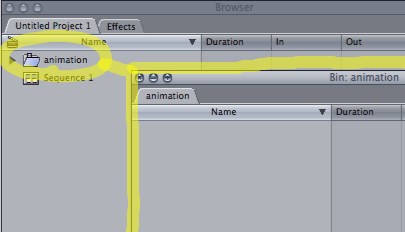
Step 6. Making sure your new bin window is selected, import all your image files. (If you don’t select your bin window first, your still images won’t go into the bin, and the rest of this trick won’t work.)
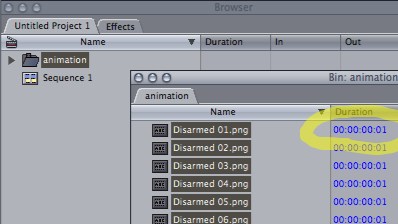
Step 7. Drag and drop your entire bin onto your sequence timeline. The frames will now play back at their proper frame rate, ready for editing or rendering.

Exporting from iMovie
Wednesday January 04th 2006, 9:01 pm
Filed under:
VideoApple’s iMovie is a great introduction to video editing. It has simple menu options for transferring your finished video to DV tape or DVD disc, but exporting a full-quality Quicktime clip of your movie takes a few extra steps. The designers probably didn’t expect beginners to have an obvious need for such a feature, but it’s a good trick to learn.
A Quicktime clip is the best way to take your iMovie work into another program for further editing. And, burned to a data disc, it can be your most easily-accessible backup. (Most beginning users don’t have have a DV camera or deck hooked up full-time to their computer, but everyone has a DVD or CD drive ready to go.)
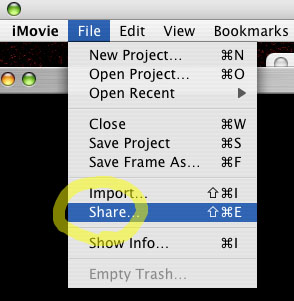
Step 1. Choose Share from the File menu. (Apple probably chose the term “Share” because it sounds less technical than “Export.” Interestingly, newer versions of iMovie have both a Share and an Export menu option. Both do the same thing.)
Step 2. Choose Full Quality DV from the Quicktime panel, and save your file.

Step 3. The resulting file’s name will end in .dv. You can go ahead and change this to the standard .mov, if you prefer.
Laptop Power Settings
Wednesday January 04th 2006, 7:52 pm
Filed under:
OS X / MacOSWhen you’re using your laptop in a live show, the last thing you want is for it to go to sleep on you. While you’re running cues or performing, it might seem wide awake, but if there’s a 10-minute gap where you’re not touching the mouse or keyboard, it might decide to take a nap on you. Make sure you have your power settings properly set before the show starts–here’s how you do it in OS X:
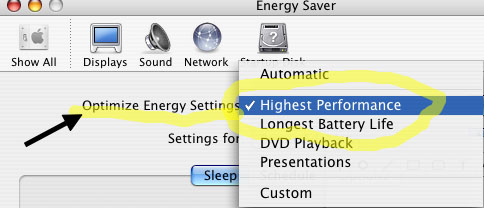
Step 1. First, find the Energy Saver panel in your System Preferences.

Step 2. For Panther and earlier, choose Highest Performance to shut off all your sleep settings in one swoop. (Be sure to change it back when the show’s done; no need to keep spinning your hard disk all day during normal use.)
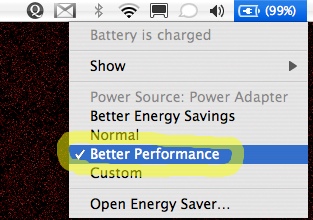
The same setting in Tiger is called Better Performance, and you can set it right from the menu bar:
One more power-management tip–no matter what you set here, your machine will probably be faster if it’s plugged in. When you’re running on the battery, most laptops ratchet down their speed as the charge runs out.
Force-Quit a Stuck iDisk
Wednesday January 04th 2006, 10:25 am
Filed under:
OS X / MacOSApple’s iDisk is meant to be an easy-to-use alternative to sending files over the net by FTP. Normally, you first rent the space you need, and then access it with OS X’s “Connect to Server” command. (For frequent visits, it might be simpler to use a free or inexpensive FTP program.)
When you rent iDisk space from Apple, on the other hand, it immediately appears like any other disk on your system, and you just copy files to and from it transparently.
Unfortunately, as well as being more expensive, this process seems to be a bit more error-prone. Sometimes iDisks freeze, and you can’t Force-Quit them like you can an ordinary program.
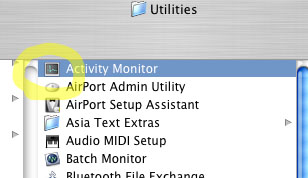
Step 1. First, go to your Applications folder, find the Utilities folder, and open up your Activity Monitor. Unlike the window that appears when you give the Force Quit command, the Activity Monitor will show any hidden programs you have running in the background.
Step 2. Find the program, or “process,” called mount_webdav. Click on the “stop” button.
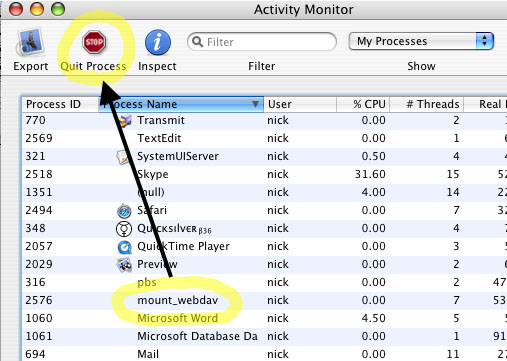
Step 3. Confirm that you want to close your crashed iDisk. You can now reconnect and resume what you were doing, without rebooting your whole machine. Any files you were in the process of copying are probably incomplete, and need to be copied over again.
