Filed under: Video
Apple’s iMovie is a great introduction to video editing. It has simple menu options for transferring your finished video to DV tape or DVD disc, but exporting a full-quality Quicktime clip of your movie takes a few extra steps. The designers probably didn’t expect beginners to have an obvious need for such a feature, but it’s a good trick to learn.
A Quicktime clip is the best way to take your iMovie work into another program for further editing. And, burned to a data disc, it can be your most easily-accessible backup. (Most beginning users don’t have have a DV camera or deck hooked up full-time to their computer, but everyone has a DVD or CD drive ready to go.)
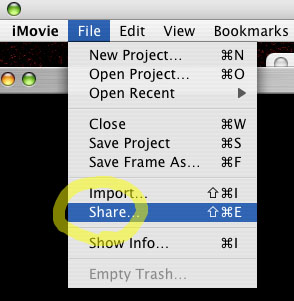
Step 1. Choose Share from the File menu. (Apple probably chose the term “Share” because it sounds less technical than “Export.” Interestingly, newer versions of iMovie have both a Share and an Export menu option. Both do the same thing.)

Step 2. Choose Full Quality DV from the Quicktime panel, and save your file.

Step 3. The resulting file’s name will end in .dv. You can go ahead and change this to the standard .mov, if you prefer.

