Brush Modes
Thursday November 05th 2009, 6:10 pm
Filed under:
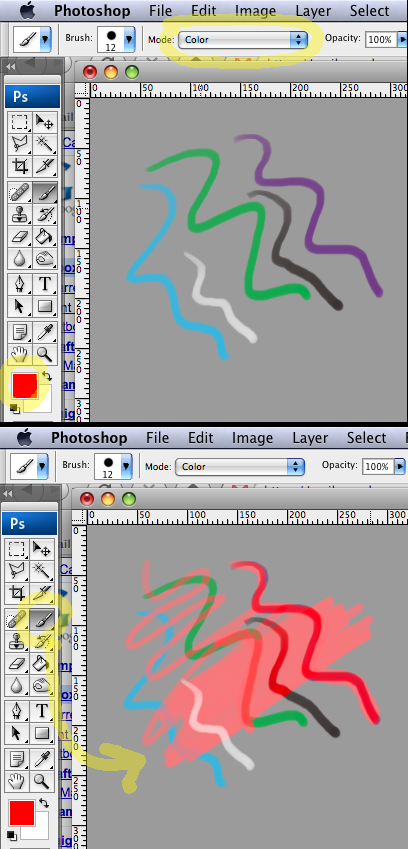
PhotoshopTry experimenting with the drop-down menu for Composite Modes when using Photoshop’s paintbrush. Here, the Color mode leaves the brightness of the underlying image unchanged–a great photo-editing trick.
Masks from Color Channels
Friday October 23rd 2009, 12:52 pm
Filed under:
Photoshop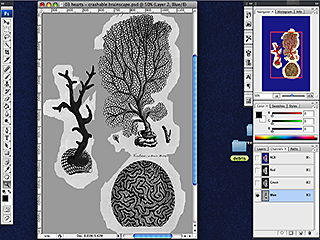
(click to play)
Here’s a video tutorial on using color channels in Photoshop to speed up the process of making masks. When selecting layers, remember:
1. Cmd-click on a regular layer makes a selection along the outer edge.
2. Cmd-click on a mask selects everything in the white parts of the grayscale image.
iPhone Video
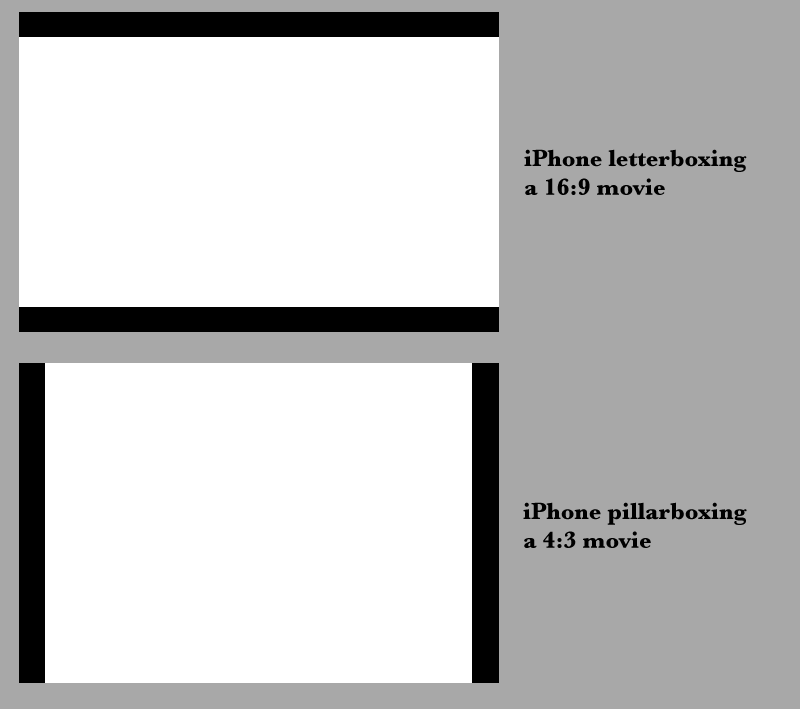
The iPhone screen is a nonstandard size, wider than 4:3 but slightly less wide than 16:9. It’s 480×320, which works out to about 14:9.
The phone scales everything to fit when playing video, so it’ll letterbox a 16:9 movie, which will be pretty gentle.
For further reading, see here and here.
Noise Reduction
Thursday August 13th 2009, 2:51 pm
Filed under:
Sound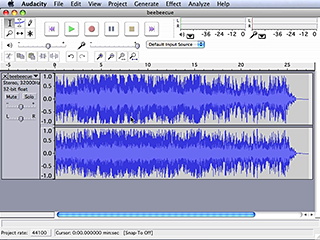
(click to play)
Here’s a basic video tutorial for noise reduction using the free audio editor Audacity. You can also do higher-quality work with Adobe Audition (don’t confuse the very similar name).
Edit Audio from the Zoom H2
Tuesday June 09th 2009, 5:57 pm
Filed under:
Sound
(click to play)
Here’s a very basic video tutorial for the Zoom H2 audio recorder. It walks you through the process of copying a file over to your computer and performing a simple cut on it using the free audio editor Audacity.
OS X on OS 9 Macs
If you have an older Mac running OS 9 and earlier, it might complain if you attempt to upgrade it to OS X. Certain older machines have genuine issues preventing them from running OS X without hardware modifications–but for more recent Macs, especially G4s, it’s more likely that Apple just has an incentive to get you moving on to new hardware.
Low End Mac explains the various issues involved in detail. They also sell RAM, video cards, and other parts for older Macs. A summary:
1. OS X 10.5 Leopard on a G4
It should install without trouble on machines 867MHz and over. Otherwise, you’ll need a utility called LeopardAssist to force an install. If LeopardAssist also fails, you might have to use an earlier version of OS X.
2. OS X 10.4 Tiger on a G4
It should install without trouble.
3. OS X 10.3 Panther and earlier on a G3
G3s can manage at least OS X 10.2 Jaguar, and some can run Panther; it varies depending on the model. (The newer G3s in blue cases will do better than the older ones in beige.) To install, use a utility called XPostFacto.
4. OS X on a pre-G3 Mac
You can consult this compatibility list for installing OS X on pre-G3 systems…but that might be more trouble than it’s worth.
Remember that, in all cases, you may need to get ahold of an external DVD drive if your older Mac can’t read DVDs. And if your install disc was bundled with an Intel Mac, you can’t use it to install on a PPC Mac.
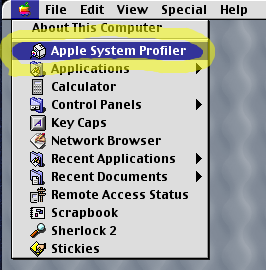
Finally, if you don’t know what kind of OS 9 Mac you’ve got, use the System Profiler:

Flash and Function Keys
Sunday May 10th 2009, 8:09 am
Filed under:
FlashUnusually for a modern application, Flash demands that you learn to use the function keys at the top of your keyboard. (On a Mac, these rarely-used keys are typically reserved for changing screen brightness, sound volume, and the like. You can change this default setting in the System Preferences.) The essential commands are:
( Create )
F7: make a new empty frame.
F6: duplicate the current frame.
F5: extend the current frame.
( Preserve )
F8: convert the current selection into a Symbol.
Command – F8 (Mac) or Control – F8 (PC): make a new empty Symbol.
( Destroy )
Shift – F5: delete the current frame, and close the gap on the timeline.
Shift – F6: delete the current frame, and leave the rest of the timeline in place.
Media Management Tips
Saturday February 14th 2009, 6:24 am
Filed under:
Concepts1. Label files accurately.
It’s always a good idea to give your files clear, descriptive names. But it becomes critical in collaborative projects, when your colleagues need to be able to distinguish between, say, a draft file that they can expect to change in the future, and a final file that they can expect to stay the same.
2. Use version numbers.
Save a new copy of your file each time you make a major change to it, adding a version number to the end of its name. This is called “versioning.” Not only can you find the most recent version at a glance this way, but you also create a simple timeline of the file’s evolution, with every major change available for inspection. (For more complex projects, you could come up with more elaborate naming schemes, or turn to automated version control software like Version Cue.)
3. Avoid duplicate filenames.
If you replace a file with a new file that has the same name, nobody but you may be aware that it’s been changed. Duplicate filenames may sometimes be necessary, but there’s always some potential for confusion. Even though you fixed a given problem with an old version, for example, someone else might be operating on the assumption that it’s still there.
4. Don’t delete old files.
Space permitting, you should archive every version of your file. Even after the project’s done, keeping old versions around can be a great help in case something goes wrong in the future. You can comb back through your files in reverse order and pinpoint where the problem first occurred.
Burn a Disc Image
Burning a disc from an image file—an exact copy of your CD or DVD saved on your hard drive—is a useful trick to learn. I’ve provided Mac OS X and Windows examples below.
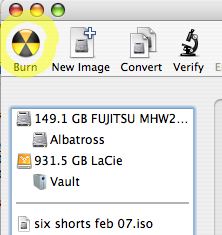
OS X example: Disc Utility
Step 1. Click the Burn button.
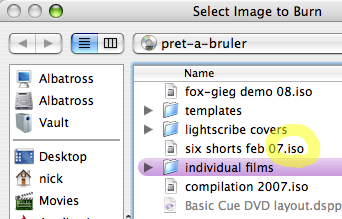
Step 2. Choose a disk image. (The standard file extension for disk images is .iso.)
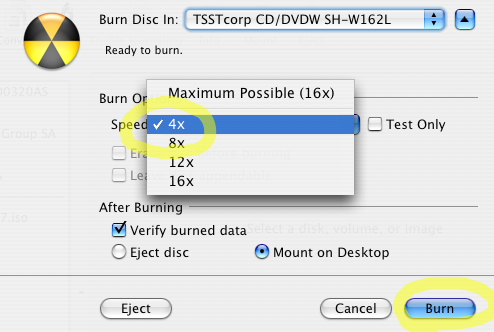
Step 3. Choose a speed and click Burn. Lower is better for audio and video; I never burn a video DVD at over 4x speed.
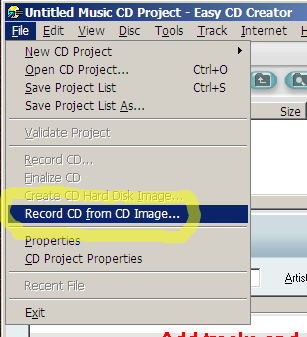
Windows example: EZ CD Creator
Step 1. Go to the File menu and choose Record CD from CD image.
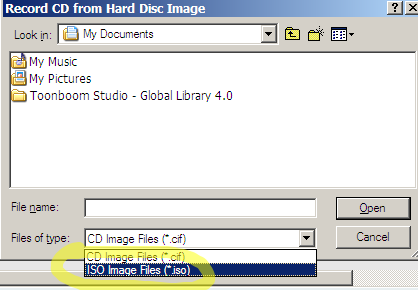
Step 2. Pick ISO image files from the drop-down menu, and choose an image file.
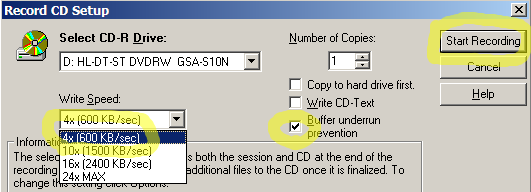
Step 3. Choose a recording speed, enable Buffer Underrun Prevention, and click Start Recording.
Copy and Paste Frames
Saturday January 10th 2009, 2:44 pm
Filed under:
Flash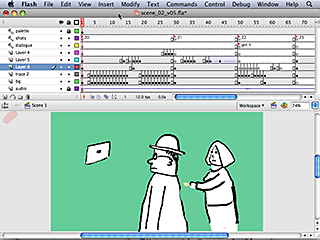
(click to play)
Here’s a video tutorial on how to copy and paste blocks of frames on the timeline in Flash. This is a great way to move large amounts of content between FLA project files–and you don’t have to dig around in the Library panel, either.

